How to create a table in Snowflake
Tables are the backbone of your data pipeline. Learn how to create a Snowflake table using a few simple commands.

One of the most common tasks you’ll find yourself doing in Snowflake is creating tables. Which makes sense. They are, after all, the backbone of your data ecosystem—where you store, query, and organize all your data.
Creating a table in Snowflake is easy, but there are some things to know before you get started. Don’t worry—we’ll cover it all, step by step.
Step 1: Log into Snowflake
Before creating a table, you’ll need to log into your Snowflake account. If you’re using Snowflake’s web app, head to Snowflake, sign in, and you’re all set.
The rest of this tutorial will assume you’re working in a worksheet within Snowflake’s native UI, but, if you have a SQL editor that you prefer working in that supports Snowflake—you can connect that as well.
Step 2: Choose your database and schema
Snowflake organizes data into a hierarchy of databases, schemas, and tables.
- Databases are the highest level of organization. Think of them as a container for organizing data.
- Schemas are the next layer of organization, acting as folders within your database.
- Tables, then, are the lowest level of organization. They are where your data actually lives.
When you create a table, you need to specify which database and schema you want your table to belong to.
You can check your current context by using this simple command and clicking the Run button:
```sql
SELECT CURRENT_DATABASE(), CURRENT_SCHEMA();
```
If you need to change to a specific database and schema, use this command:
```sql
USE DATABASE my_database;
USE SCHEMA my_schema;
```
You can also use the dropdown at the top of your worksheet to select the specific database and schema you want to work with.
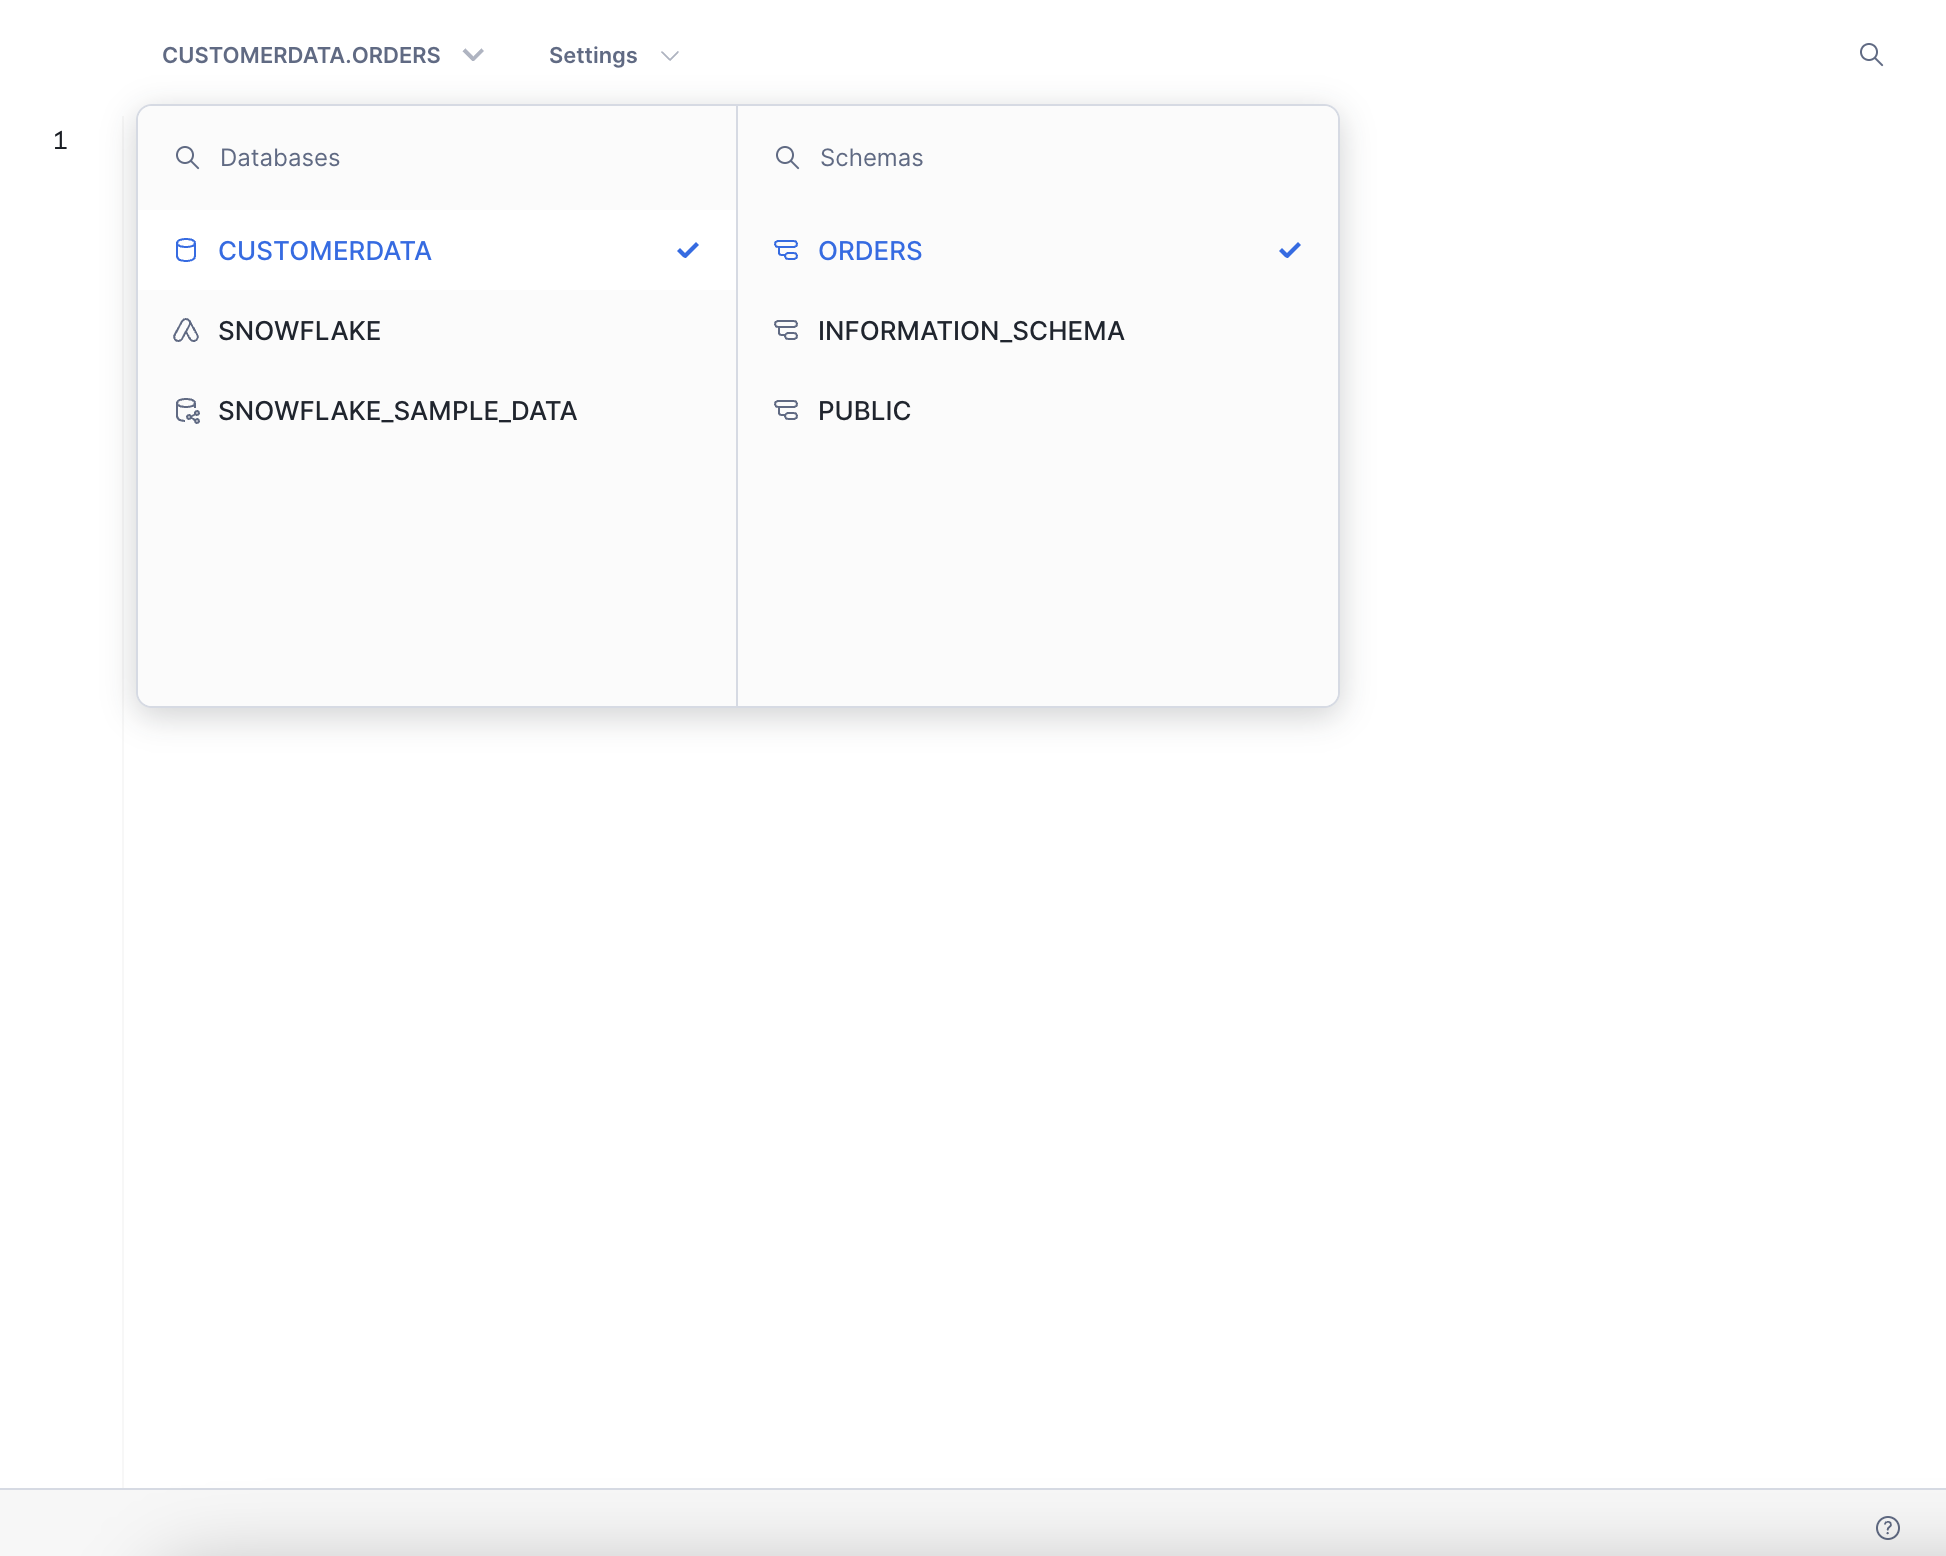
Here, I’ve selected `CUSTOMERDATA` as my database, and `ORDERS` as my schema.
Step 3: Write the `CREATE TABLE` Command
Now we’re ready to create a table. Snowflake uses standard SQL syntax, so if you've worked with other databases, this should feel familiar.
Let’s say you’re creating a table to store customer information, and you want to include their customer id, name, email, and first order date. Your SQL command would look like this:
```sql
CREATE TABLE customers (
customer_id INT,
name STRING,
email STRING,
signup_date DATE
);
```
A quick note on data types
Snowflake supports a wide variety of data types—STRING, INT, FLOAT, and DATE are some of the most common ones.
- STRING is for text.
- INT is for whole numbers.
- FLOAT is for decimal numbers.
- DATE is for, well, a specific date. Snowflake also has TIMESTAMP if you need to track time down to the second or millisecond.
If you’re not sure which data type to use, check out Snowflake’s data type documentation.
Step 4: Run your command and check the table
Once your done, go ahead and run your `CREATE TABLE` command by clicking the Run button. Once it executes successfully, you should see a confirmation at the bottom of your screen.
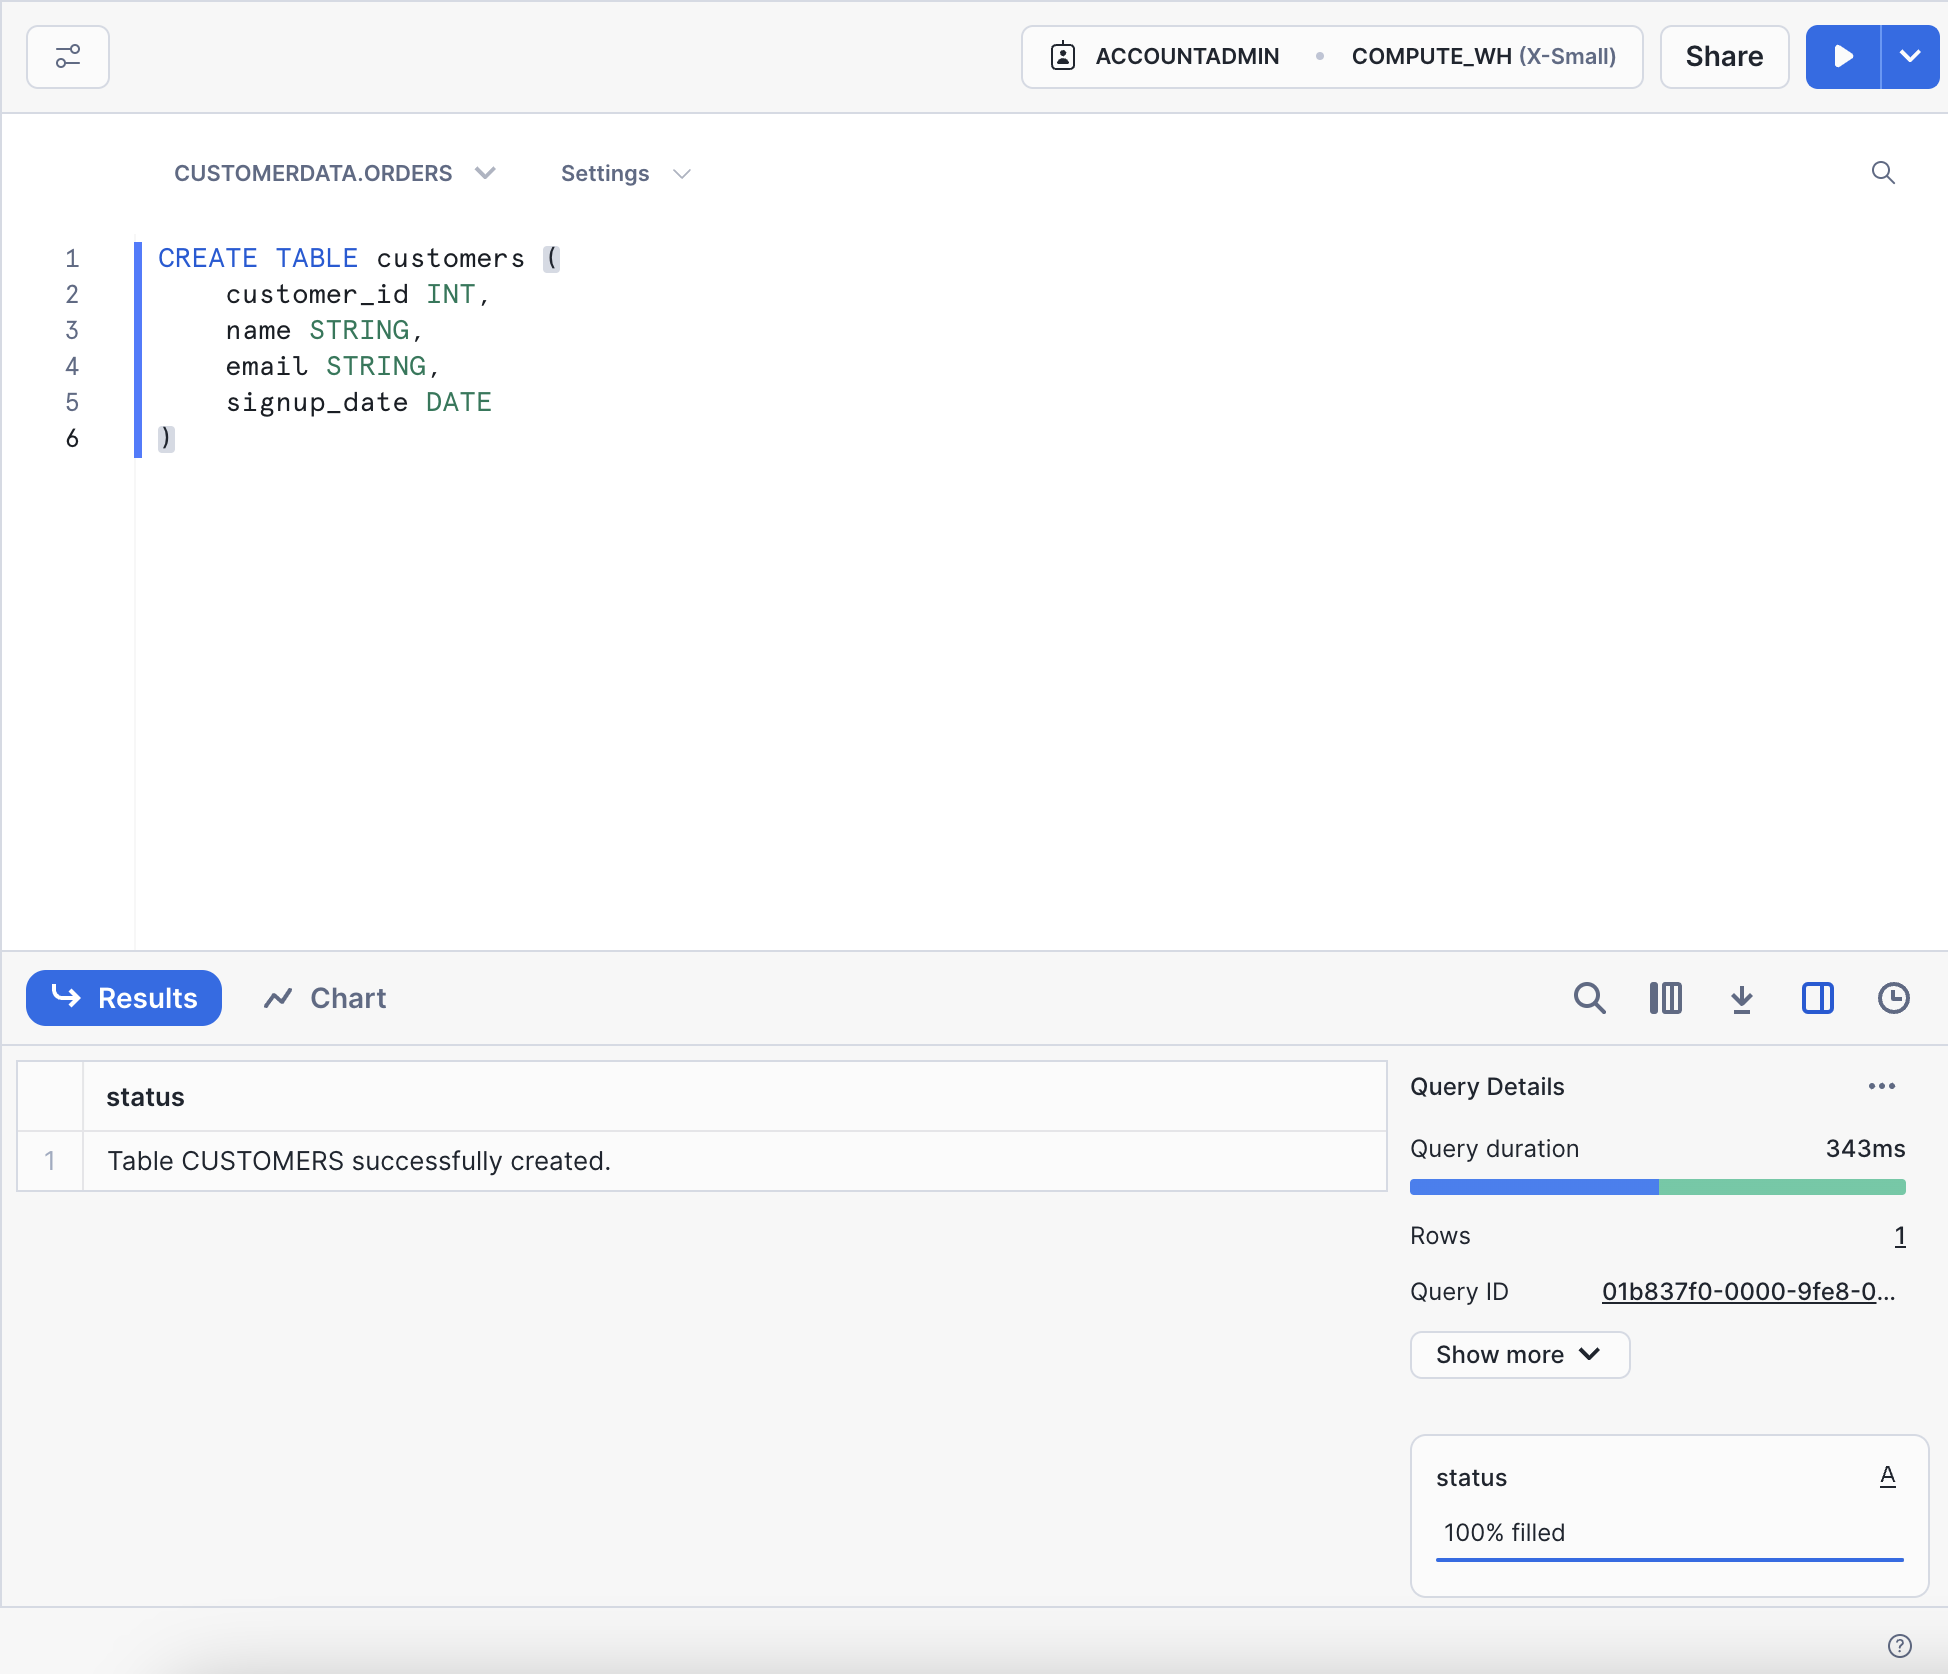
You can also confirm that your table was created by running a quick query:
```sql
SHOW TABLES LIKE 'customers';
```
Once you see confirmation, your table is officially created! Now, for a couple of optional steps.
Step 5: Insert some data
Now that you have a table, let’s throw in some data. Data can come from tons of different data sources. You can choose one by clicking Data > Add Data from the nav on the left side of your Snowflake homepage, or running an `INSERT INTO` command to add records manually:
```sql
INSERT INTO customers (customer_id, name, email, signup_date)
VALUES
(1304, Emily ‘Johnson’, 'emily.johnson@email.com, '2023-06-15'),
(1305, 'Michael Smith', 'm.smith23@email.com', '2023-06-16');
```
Step 6: Query your table
Once you’ve got data in your table, try a basic `SELECT` statement to see what’s in there:
```sql
SELECT * FROM customers;
```
Run this command, and you should see the data you added to your table appear at the bottom of your screen.
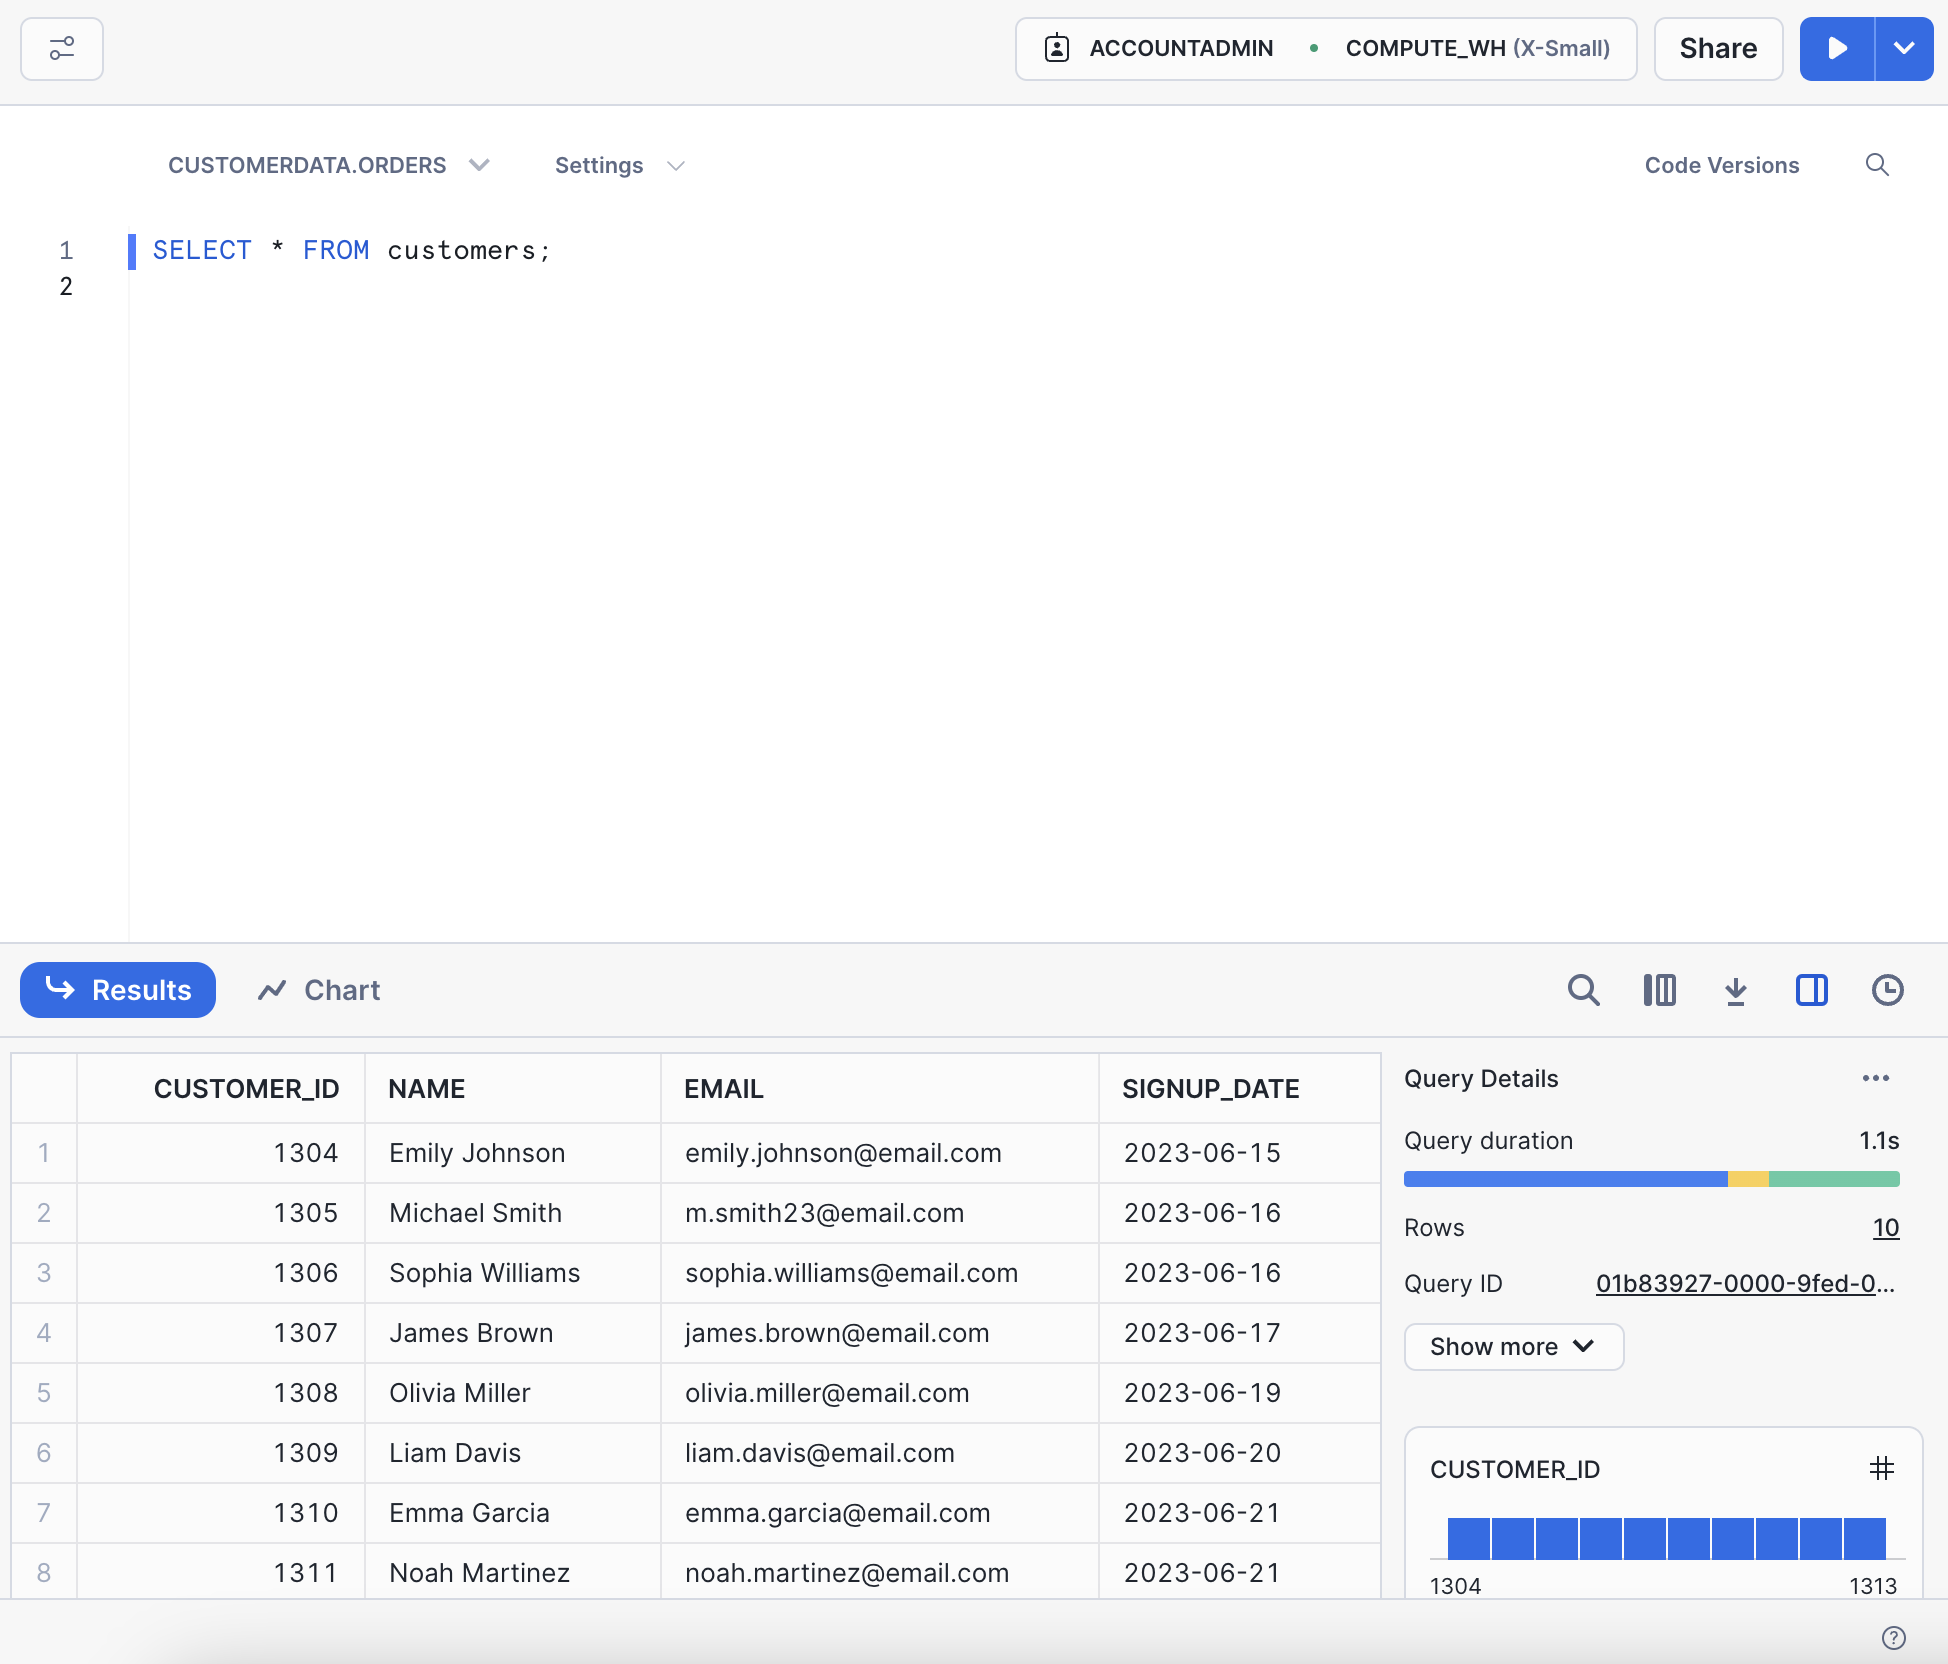
This is just a basic rundown, but if you're planning to use this table in a production environment, you might want to set up primary keys or indexes, or maybe even consider partitioning depending on your use case.
Types of tables in Snowflake
Now, you might notice that there are a few different table types in Snowflake. Feel free to check out a more in-depth look at the types of tables in Snowflake, but for now, here’s a quick overview.
- Permanent Tables: These are your most standard table type. They can also be known as Base Tables, and are are best for essential, long-term data.
- Transient Tables: These are similar to permanent tables, except that they do not have a fail-safe period. Designed for temporary but frequently-used data.
- Temporary Tables: These are best for storing non-permanent data that you might only need within the context of a single session—like ETL data.
- External Tables: These tables are designed to let you query data that lives outside Snowflake as if it were bring stored in Snowflake. Your data might be stored in a data lake, but can still be queried in Snowflake via an external table.
And that’s it! You’ve got your Snowflake table up and running. From here, you can start adding more data, tweaking your schema, or exploring Snowflake’s more advanced features.
Table of contents
Tags
...
...

